Tip of the Week: Turn Off Bluetooth on Android When Not in Use

a close up of a cell phone with the wi - fi address on it

Bluetooth technology is something that many of us use on a daily basis. For many new Android users, enabling and disabling Bluetooth can be a challenge, but today we’re here to share one of our top user tips to help you make the most of your mobile devices. We’ll also discover why you should turn it on and off and if it’s really something that’s necessary to do when not in use.

How to Enable Bluetooth on Your Android Device

The quickest way to turn it on with an Android device is to head to the quick access panel which you can find at the top of the Android screen. When you swipe down, you’ll see an option for Bluetooth at the top. Some mobile devices do require you to swipe down twice in order to access these settings, but once you get there, you’ll just tap the Bluetooth button to switch it on. You’ll then need to connect it to another wireless device in order to start using this handy feature.

The other option for enabling it is to select the following: Settings > Connected Devices > Connection Preferences > Bluetooth.

How to Turn Off Bluetooth on Your Android Device

There are many reasons why you might need to turn it off, but the good news is that it’s quick and easy to do this when needed. You’ll just follow the steps we shared above for switching it on, but carry this out in reverse order. Swipe down on your mobile device’s screen either once or twice, and then hit the Bluetooth button so that it switches off. You can also follow the instructions to go through the Settings feature, making sure your Bluetooth toggle shows it’s off instead of being left on.

Why Would You Want to Disable Bluetooth?

After reading our user tips for this week, you might be wondering why you would even need to switch off Bluetooth in the first place. The main reason to consider doing this is you don’t want your personal device to just connect to any mobile devices with Bluetooth enabled. With so many concerns surrounding cybersecurity and hackers, you never know what could happen to your phone or tablet as a result of this. You’ve no doubt heard news stories over the years about these security and data breaches, so we recommend always switching off Bluetooth when you don’t need to use it. On top of that, always try and keep an eye on your phone to make sure it never automatically connects to any devices that are nearby.

We hope this week’s tip of the week has been a great help for anyone using an Android device. Make sure you subscribe for more tips each week to help you make the most of your technology for business and personal uses.

Contact Us Today and Check Out Our Cabling Services!

Tip of the Week: Bringing Off Screen Windows Back Onscreen

a person is typing on a laptop computer

Using several monitors while at work can be extremely advantageous. Once you try it, you will most likely never want to go back. However, there are times that Windows might still act as though you are using an additional monitor even when you aren’t. This can cause inaccessibility to your application windows, making it difficult to be productive and efficient in the workplace. 

Continue reading to learn how you can retrieve your off screen windows back on screen.

How to Get Your Windows Back on Your Display

The process to complete this is actually very easy. The first step you need to do is Right-click on the Windows taskbar. A pop up menu will then appear and you will need to select Cascade windows. While holding the Shift key, right-click on the application’s icon in the Taskbar. A new pop up will then appear. You will then select the Move option. This will allow you to move the window using the arrow keys on your keyboard.

And that’s it! Very simple and easy to do. 

We hope this helps you retrieve your off screen apps back on screen. Please remember that we, at AE Technology Group, are always here to assist you and your company with any IT questions you may have. To learn more about what we can do for your business, please contact us today at (516) 536-5006.

Contact Us Today and Check Out Our Blog!

Tip of the Week: How to Remove or Hide Desktop Icons

For many people, the desktops of computers or laptops often get extremely cluttered with various icons and files. Fortunately, there is a way to delete and/or hide those icons from your screen view which will allow for increased productivity and improved organization. Continue reading to learn how this can be done using a Windows PC. 

An important thing to remember, which is also a common misconception that many people are unaware of, is that when you delete an icon from your desktop, it does not remove the program from your computer. Deleting the icon from your desktop will simply remove the shortcut to the application. If you want to delete the entire application from your computer, you should follow a completely different protocol. 

How to Delete Icons from Your Desktop

There are a couple different options you can use to delete icons from your Windows desktop, making it very convenient and easy to accomplish. To begin with, you must identify which icon or icons you want to delete. If you want to choose several icons, you can hold down the Ctrl key and then click on the icons you want to delete. Once all icons have been selected, you will then right-click on any of the icons and choose the option Delete from the drop down menu. 

Another option you can do to delete icons from your desktop is simply click and drag the icon or icons to your Recycle Bin to delete them.

By doing so, this will send the selected icon or icons to the Recycle Bin where the icon or icons can later be found in the future, if you ever need them. 

How to Hide Icons

Instead of deleting icons from your desktop, you also have the option to hide them on your desktop. This alternative is also easy and straightforward to do. The first step you have to do is right-click on your desktop. You will then hover over the View option in the drop down menu. Then, you must uncheck the option for Show Desktop Icons. This will hide them all from view. In order to see your icons again, you will just have to re-check the option. It is important to remember that this is an all or nothing option. You will be unable to select which icons you want to hide. This option will hide all icons on your desktop.

For additional questions regarding hiding or removing desktop icons or for any questions related to your IT needs, we at WheelHouse IT are here to help. Contact us today at 954.474.2204.

Contact Us Today and Check Out Our Blog!

Tip of the Week: How to Print a Word Document on Both Sides

a person using a cell phone to print on a printer

More than likely your business spends a substantial amount of money on the costs of printing, unless your company has gone the completely paperless route. Oftentimes, people may forget to select the “double-sided” feature while printing. If your printer is able to print on both sides without having to reload the paper every single time, then this article is for you. Continue reading to learn how you can do this in Microsoft Word and never have to worry about having to select the option again.

How to Print Double-Sided in Microsoft Word

To print double-sided in Microsoft Word, you have to go to the “File” tab. From there, you select “Print”. This will open a window that contains all of your printing options. Another way to open the print options window that might be easier for some is “Ctrl + P”.  Under the print settings, you will find a dropdown menu that contains different kinds of settings as they relate to printing. You will then see a setting that is by default set to “Print One-Sided.” In order to print on both sides of the paper, you will need to change this setting.

You will see different options to “Print on Both Sides,” such as an option to flip the page on the long end or flip the page on the short back. This is a personal preference. It depends on how you want the information to show on the other side. For instance, printing a brochure in landscape mode is best suited on the short end. While printing a normal document in portrait mode is best done on the long end.

Things to Know:

It is important to remember that you do not want to manually print on both sides of the paper since it wastes a lot more time. If your printers are able to print on both sides, the company can save a considerable amount of money by printing on both sides of the paper as well as helping the environment since doing this will reduce paper waste. By going paperless, you will save even more as well as make a bigger difference for our planet. 

For more information or to learn how our company, AE Technology, can help your organization get started with a paperless solution, contact us today at (516) 536-5006.

Contact Us Today and Check Out Our Blog!

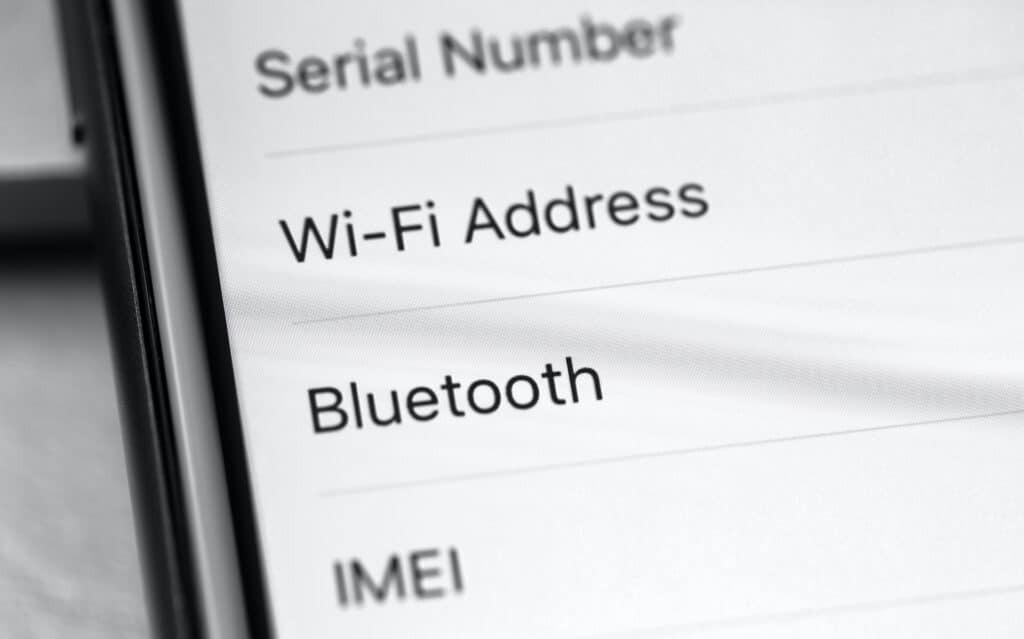
How (and Why) to Find Your IMEI on Android

IMEI in a binary code 3D illustration

Wouldn’t it be nice if you had an easy way to track your device even if it were lost or stolen? Thankfully, this feature exists to an extent for Android devices in the form of the IMEI, or international mobile equipment identity number. If you know this number, you could potentially help mitigate the issues that losing a device can present.

Your international mobile equipment identity number (IMEI) is a 15-digit number that is unique to every mobile device. As such, if you keep track of your IMEI numbers, you can keep a detailed record of every single individual device your organization uses. Generally speaking, you can find the IMEI number on your device’s box, but if you are like most people and have already thrown it away, there is still a way to find the IMEI. We’ll go over how to find it for your records and so that you have it on file in case you need to report a lost or stolen device to the authorities.

Method 1: Make a Quick Phone Call

All it takes is a quick phone call to find your IMEI number. To start, open up your Phone application (you know, the one you use to make calls) and dial the following number:

#06#

A dialogue box will open with information about your device, including your IMEI number.

Method 2: Find it in the Settings App

If you’d rather not just make the phone call, you can also find this information by digging through your phone’s settings. Here’s how to do it:

  • Open the Settings app
  • Tap About Phone
  • Scroll down until you see the IMEI number.

Knowing what your IMEI number is can help you keep your device, as well as its data, safe from prying eyes in the event that it’s ever lost or stolen. You can even remotely lock your device should you need to do so.

We can also hook your business up with a mobile device management tool that has even more comprehensive mobile device security solutions, so don’t hesitate to reach out if you are ever concerned about your business’ mobile device security.

What other tips would you like to see us cover in the future? Let us know! And be sure to check back every week for our weekly blog posts.